Thursday, July 31, 2014

Health and Beauty : Get fresh sparkling eyes

Hallo my dear friends :) 


Irina's beauty advices is here once again to take care of your health and beauty :)

Specifically, today's article is dedicated to the jewels of your face.... your eyes ! 

The following tips will show you how to get fresh looking,sparkling eyes which will lighten up your face and make you look even more healthy and beautiful ! Hangover? Too little rest lately? No worries , the solution is here ;) 


Tips for Sparkling Eyes with Home Remedies:

If you are into home remedies, you can find even more tips on my skin health care article 

1. Place tea bags (chamomile preferably) 

Soak the teabags in a bowl of ice water for a few minutes, put them over your eyes and relax until they become warm. This refreshes your eyes.

2. Before you sleep, massage almond oil around your eyes gently.

In the morning, you’ll find the skin soft and supple.

3. Carry a spray of rosewater at all times.

When you feel tired, spray some on your face and your eyes will feel much better.

4. Alternatively, cotton pads soaked in cold rose water over the eyes also provide soothing relief and bring you a step closer to sparkling eyes!

5. Amla

Amla has Vitamin C, which is very good for the eyes. Incorporate it into your diet or soak it in water and use the water to cleanse your eyes. For more diet tips with benefits on your skin health click on the link above and find out more ;)

Tips for Sparkling Eyes with Makeup:

1. Apply colors around your eyes that complement your eye color.

For example:  for brown eyes, bright colors like purple and turquoise are preferable. Green and blue eyes look also great with purple but also darker shades make a great contrast with these eyes and look even lighter :) My eyes are a mixture of light brown and green (depending on the lighting) so these shades of purple are IDEAL.

This is my eye with purple smokey eye make up . Check out my tutorial here ;) 

2. Use a shimmering light colour

On the inner corner of the eyes and or under the lower lash line, right in the center. This lights up the eyes adding sparkle.

3. Always conceal your eye area before applying makeup.

For dark circles, use a lighter pink based concealer to make your eyes seem young and rested. You can also v
isit my article about proper preparation of your face before make up and tips how to cover imperfections here 

4. Curl your lashes with mascara

This opens up the eyes adding that sparkle.
Great groomed eyebrows will frame your eyes in a way that makes them look more beautiful.

Tips to Follow Everyday:

1. Get enough sleep, without it your eyes will look droopy.

2. Eat foods rich in Vitamin C and A

Like carrots, almonds, papaya and all citrus fruits are great for eye health! For more diet advices with benefits on your skin visit my analytic article here  

3. Drinking a lot of water prevents dehydration as it can cause bloodshot eyes.

4. If you spend long hours in front of a computer screen, keep some soothing eye drops with you
to stop them from drying out or becoming red and irritated.

Also taking breaks every 45 minutes will save your eyes.

5. Never tug at your eyes, don’t rub them.


Your eyes and the skin around them are very delicate, so be careful!

6. Never sleep with makeup on, it causes a lot of infections.

There is also a review of facial make up removing soaps here 


( Thanks to http://www.healthdigezt.com/ for this great source )


This is it for today :D Hope this tips will be useful for you and make you shine out the way you deserve :) Have a great day and come back soon ! For any question/suggestion/request contact me :DLove and kisses,Irina <3 


CONTACT INFORMATION


Emails :
&
Facebook page : 
click here

Twitter :
click here

Skype :

irina.alexopoulou

Instagram :

Pinterest :


Thursday, July 17, 2014

Makeup : Summer Sunset makeup

Aloha dear friends :)

I'm glad you are back , today i will show you step-by-step how i got my "Summer Sunset Makeup"  which i tried for fun and i liked a lot how it turned out :) Inspired by the beautiful colours of summer sky during sunset <3 
To begin with , the final result is a combination of many different eyeshadows which give this sunset sense through blending them together gently . Here's my tutorial to get this look, you can also get inspired and try your own ideas :) Let's get started !! 

STEP ONE :

Follow your typical preparation routine for your skin and create an ideal base for your make up . You can find out how to get a flawless look HERE 

STEP TWO :

Since you are done with your preparation and foundation you are now ready to proceed to eye makeup part .

First of all let's see what you will need to get this look . Here is a pallet of non-glitter eyeshadows that i used for this look and i put numbers to show you which of them i used so that you'll be able to understand which one comes next . 


  • Eyeshadow work

1) Use a small brush , take some pure white eyeshadow and apply it on the inner corners of your eyes

2) Take some of the eyeshadow #2 and apply it across the whole eyelid except the inner corners that must remain white . If in any step you accidentally cover them with another colour ( ex. through blending ) don't forget to apply #1 to the inner corners again. 


3) Using a proper brush , apply the eyeshadow #3 on the outter corners of your eyes starting from the center of your eyelid. Also use this colour across the bow right above your eyelid (under the bone) to create a deep look. It will look a little messy at first but you can smooth it using a thick brush.


4) Repeat the process using the 4th eyeshadow and apply is ALSO across the line of your upper eyelashes. Use a thick brush and blend gently the eyeshadows with direction TO inner corners.


5) After you ensure inner corners are still white , apply the light lilac colour on a thick vertical line just next to white colour of your inner corners

6) Continue with pink colour , forming a vertical line next to the lilac one , almost in the middle of your eyelid.


7) Use your fingertip to take some deep orange eyeshadow and tap it gently two-three times on the center of your eyelids.


8) Use again a thick brush to blend them smoothly BUT the direction will be from inner to outter corners this time . 


9) Take some dark purple eyeshadow and reshape the outter corners . Don't forget to smooth the line creating a nice purple shadow effect. 


  • Eyepencils' duty
  1. Draw carefully the line of your upper eyelashes using a dark brown eyepencil . Try to make the line as thin as possible.
  2. Do the same for your lower eyelashes' line using a dark purple eyepencil ( i used Maybelline New York ones since it's too soft and long lasting )   


***** 
(Optional) 

Use your fingertip to take ONLY a touch of some light gold glitter eyeshadow and tap once the center of your eyelids gently . 
This will brighten the whole look :) 

*****


  • Mascara BOOM !
Finish your look using a killer black mascara ( i used Estee Lauder classic black) both on upper and lower eyelashes ! Congratulations ! Now your eyes look super killer sexy :D


STEP THREE : 

Time to make your cheeks super healthy looking ! Apply (only a little) pink blush under your cheek bones or light peach one if you have tanned or dark coloured skin ^_^ 


STEP FOUR :


Super lips is the last but not least touch ! You can either add a pink/coral lipgloss or a darker pink lipstick. I prefer bold colours on my lips and i used a crimson lip-pencil , great colour and super long lasting ! If you apply lip-pencil instead of lipstick BE SURE you have hydrated lips otherwise they may crack spoiling the whole lip makeup .               


And here's the final look 


*********************************************************************************


Here you are :) This was my version for sunset inspired make up :) Feel free to express your opinion and contact me for any question/suggestion/request !  
Thank you for visiting my blog ! <3
Hugs 
Irina 


CONTACT INFORMATION


Skype : irina.alexopoulou
Facebook : ( click on the word to view my profile )

YouTube Channel ( click here to view my channel )

Wednesday, July 16, 2014

Make up : How to prepare your face and create a base for your make up

Hallo everyone :)

Today's article is really important for all the girls out there who are keen on make up .

Ever wondered how can make up artists achieve a totally professional and flawless look even though you may use exactly the same products?

The answer includes two simple but really important secrets : It's the combination of technique and proper preparation of the skin !

To begin with , most girls just apply a layer of make up or/and some concealer and then go on to eye/lip make up . Some others put on so many layers of liquid make up AND powder trying to hide any imperfection of the skin such as discolourations,black areas,pimples etc.

I don't claim to be a professional make up artist but here's what i've learnt alone all these years through my every-day experience and worked good for me :


The right technique is a matter of exercise and it will take some time till your hand will perfectly handle all the brushes and stuff . But right preparation of your face is the most important step of your skin treatment both for keeping it healthy and ensuring the flawless make up result :)


To begin with , start with a deep cleanse of your face using a proper antibacterial face soap . Avoid 'make up removing tissues' since they remove your make up but don't clean deeply your skin - a really important process to keep it clean and soft .

You can find a review of facial soaps by me here .

TIP:
You can use a scrub for your face weekly( depends on your skin type - sensitive and dry skins shouldn't be scrubbed more than 2-3 times per month)

Next step is wiping your face gently with a CLEAN and DRY towel . ( Wet towels are perfect places for fungal growth so be careful )

Right after apply your hydrating cream and let it be absorbed completely .

Let's get serious now . Even if there are pimples or such imperfections on your skin , applying heavy layers of aaaaaaaaaany product won't make them disappear. Most of the times heavy layers make them bolder and noticeable . Though, there are some tips to 'hide' them but be a realist on your expectations ! :)


Here comes the part of skin correction :


Part one : CONCEALER

This is the most important step to get a flawless skin . You can either work with a pallet of different concealer colours or if you don't own one ( don't worry - me neither ) you will work with the typical one coloured concealer and some NON GLITTER EYESHADOWS .

Why is it so important?


  • For any red area on your face ( such as burnings,pimples,cysts etc ) you can use green colour to smooth the redness so either use the green tone concealer from your pallet or mix some green eyeshadow with your concealer and apply the mixture on problematic area.


  • Black areas or darker skin parts? Here you can deal with yellow base concealer ( or mix yellow with regular concealer ) and apply it on your skin .


A super bad/fake/heavy make-up example to avoid.


IT'S REALLY IMPORTANT TO CHOOSE THE RIGHT COLOUR OF YOUR CONCEALER AND APPLY IT OOOOOONLY ON THE AREAS YOU NEED IT . Otherwise you'll create a really heavy and fake effect on your skin like the one displayed in the picture. Not charming at all , huh ?


TIPS : 

  • Don't use cyclic movements on the under-eye area - it will make it worse. Try forming triangles.


  • Instead of pushing and pulling the skin during your concealer application try just to tap it gently until it's blended with the skin nearby


  • If there is a super noticeable big pimple try to apply a product ( cream,gel,whatever you prefer ) that includes salycylic acid - before applying your concealer. It dries the pimple and helps it get smaller .


  • For super swollen eyes , before any make up process try any of the methods reffered here (especially step 6)


Once you are done with concealer you are ready for......


Part two : FOUNDATION !

Choose the right foundation for your skin both according to colour,skin type and format , i personally prefer BB (from Maybeline New York) and CC (from Tommy G) Creams since they are light giving a really nice result on my skin and the most important :  they let it breathe !


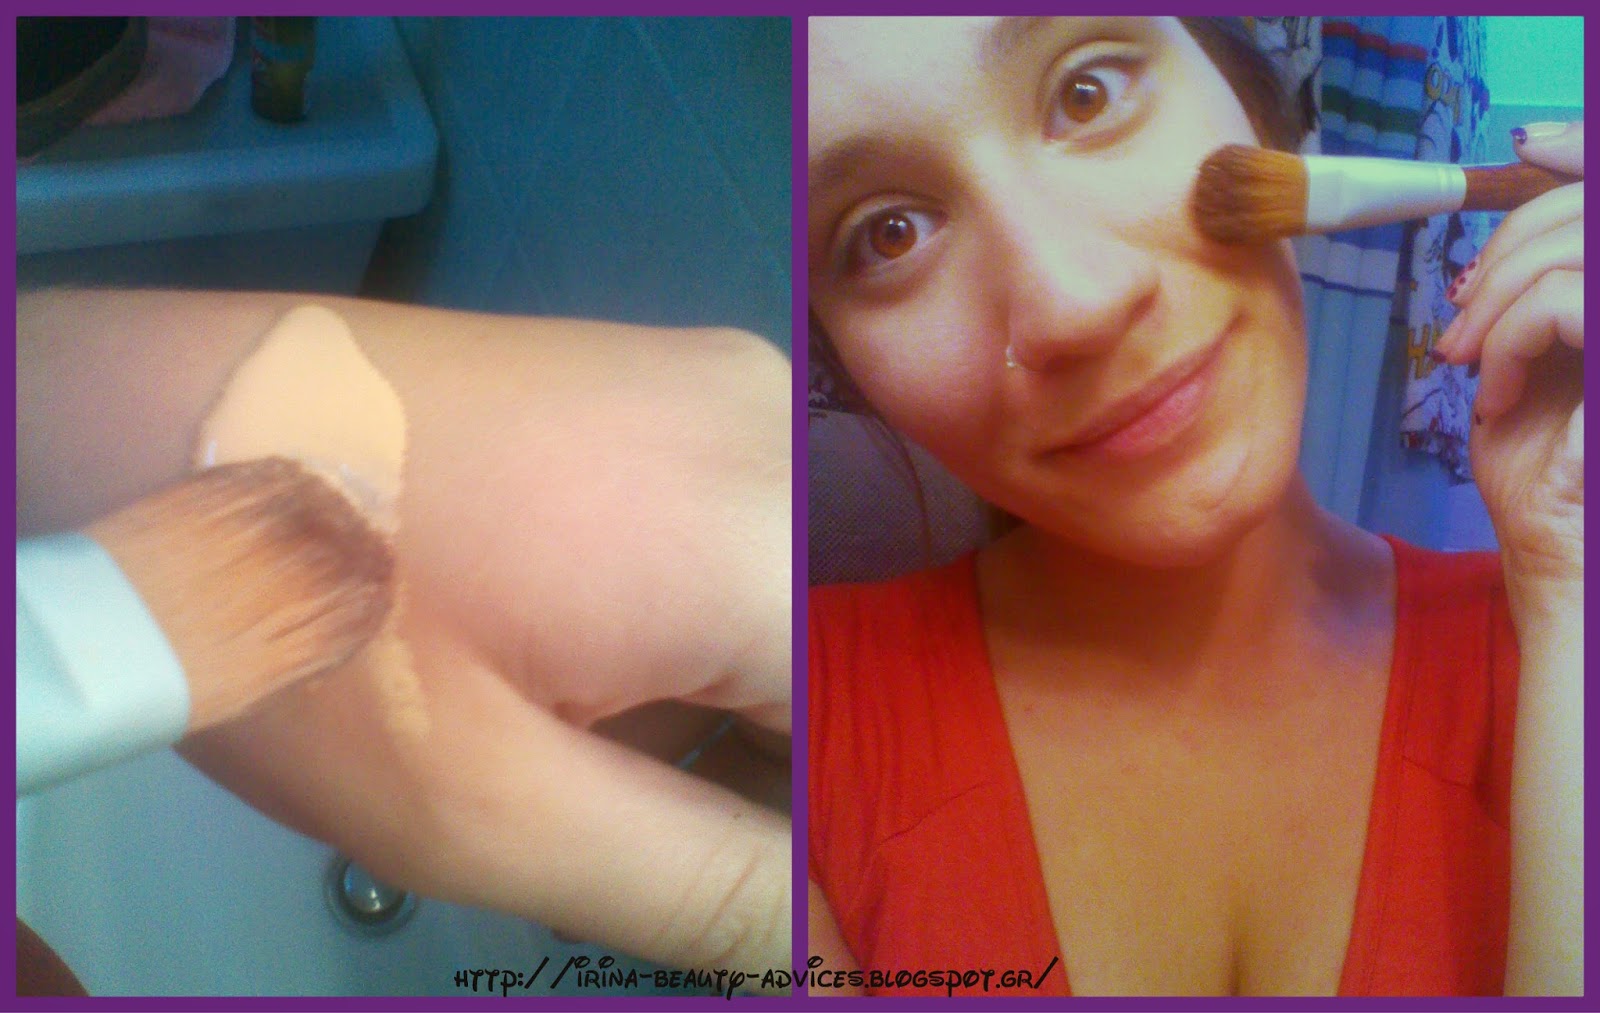
Use a brush to apply your foundation instead of using your fingers ! Almost 30% of the whole product will just stay on your fingers ! You can use your fingers just to fix areas such as nose side areas or inner corner of your eyes ( BE SURE YOU HAVE CLEAN HANDS BEFORE TOUCHING YOUR FACE ! )


Also don't forget to wash your makeup brushes once a while using an antibacterial soap and warm water !
Ignoring the basic cleaning rules you let thousands of bacteria grow running a risk for skin infection !

And now you are ready to go on with any other make up part you want :3


And that was it for today :) Hope you liked my article and found my tips useful for you ! If you like my blog show your love by supporting my page :3

Feel free to leave a comment or contact me to ask/suggest/request anything . You are always welcome to show me your results ! 

Thank you for viewing my blog :) Come back soon <3 

Irina


CONTACT INFORMATION


Skype : irina.alexopoulou

Facebook : ( click on the word to view my profile )

YouTube Channel ( click here to view my channel )


Tuesday, July 15, 2014

Nails : Summer nail ideas (part 1)


Tadaaaan :) Here i am again !


Today is the first part of Summer nail ideas for you !

All the manicures displayed are done by me , at home without any special equipment . Really easy to get and you can do it on your own ! For any question or request for tutorials don't hesitate to contact me :)

You can also use these ideas for your pendicure :)


Number one : Nude colour base , crimson edges and dots,strass and flower accessorie


A suggestion for matching pendicure - Total crimson pendicure decorated with strass and silver-lilac butterfly accessories . 

P.S. I apologize for the aweful quality of photos but i don't have my digital camera since last year so all these pictures are taken via mobile .


Number two : Simple turquoise manicure - super summer colour !


Number three : Blue electric metalic coloured manicure


Number four : Love Lilac base with crimson dots and kitty drawing :3


Number five : White base , black edges and flower decorated manicure


Number six : Dark green simple manicure with one nail decorated with black edge 
Here is a recommended  match with make up 


Number seven : Easy Home-made Ombre manicure ! 

Here  
is the tutorial to achieve this look performed by me :)


That's it ! Hope you liked it , stay tuned for part II ! 
Feel free to contact me for any question/suggestion/request
and spread our secrets out there !

Till next time , take care and enjoy your summer :3

Hugs,
Irina :*


CONTACT INFORMATION


Skype : irina.alexopoulou

Facebook : ( click on the word to view my profile )

YouTube Channel ( click here to view my channel )


Sunday, July 6, 2014

Recipes : ULTIMATE SUMMER SMOOTHIE

Hallo everyone :)

Irina's Beauty Advices is back , keeping you company all these extremely hot summer days !


At first HAPPY INTERNATIONAL KISSING DAY since it's 6th July today ^_^ <3

We're in the heart of summer and it's really important to keep ourselves hydrated , so what's better than drinking a super delicious,refreshing and healthy smoothie?

The recipe is really simple and the taste will amaze you :D !!

Here's what i tried today !


'' WHITE PLEASURE '' SMOOTHIE

You will need :


  • 1 large banana
  • 2 tea spoons of honey
  • 1 small peach 
  • 200 ml milk
Put everything in the blender using the strongest blending ! Pour the mixture in a high glass ( it will be about 600-700 mL ) , add some icecubes and voila !


Also there's another alternative recipe that was equally tasty , here it is :


'' SWEET PINK SMOOTHIE '' 

You will need :
  • A cup of strawberries 
  • 2 tea spoons of sugar
  • 200 mL milk ( or 100 milk and 100 yogurt )
  • 50 gr of cherries/crandberries/blueberries
  • some vanilla flavour ( optional )
  • 1/2 of a small sliced banana


Put everything in the blender but be sure you will remove the green leaves from strawberries . You can also replace the sugar with honey but personally i prefer sugar in this recipe :) Note that strawberries and the other berrie species have detox features :3
 I also added some smashed ice . 


ENJOY ! ^_^ 


That's it ! Have a refreshing,relaxing day with your loved people and enjoy your smoothie :)

If you liked my blog feel free to share it out there showing your support ! Your messages with questions/requests/suggestions etc are very welcome ! Stay tuned for more updates ^_^

Hugs ,
Irina 


CONTACT INFORMATION


Skype : irina.alexopoulou

Facebook : ( click on the word to view my profile )

YouTube Channel ( click here to view my channel )


About Me

My photo
A very multitasking elf in modern times. A molecular biologist specialized in cancer research (MSc), a marine scientist (BSc) and Fitness Coach who aims to share light and help the world. Besides academia, elven eyes stare at beauty and self improvement with separate blogs dedicated to the topic, where you can access education, tips and inspiring mindset ideas. The minimal spare time of an elf includes a lot of nature strolls, exercise, art and handcraft creation, book reading and positivity manifestation.