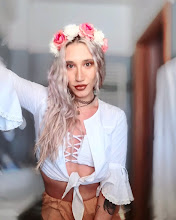
Halloooo :D
Thanx for visiting my blog ! Today's article is connected with the previous one ( http://irina-beauty-advices.blogspot.gr/2013/08/make-up-how-to-transform-round-eyes-to.html ) as long as it's a photo step-by-step tutorial to achieve Eva's hairstyle i made on the previous article, easily on your own ! :D
The steps are extremely easy and the result is quite stunning and can be transformed to a formal look if you choose that type of clothing ! Hope you will like it ! Here we go !
Here's a list of what you will need :
1. Hair slides
2. A fine comb
3. Schwarzkopf GLISS Hair Repair with liquid keratin for dry/damaged hair
4. Straightening machine ( i suggest Bellissima products , the quality is really good and the price is normal )
5. A thick brush
6. An elastic ribbon for hair
7. Tiny plastic (or silicone) ribbons
Step 1:
Put some of the liquid hair repair ( it's leave-in , you don't need to wash it out ) on your hands and apply it to your hair . If your hair have medium length the amount of the product you will use should be same as the size of a hazelnut . Brush your hair with the thick brush starting from the edges of your hair .
As long as Eva's haircut has short sections of hair on the front side , i let them free on the front side and made the ponytail on the back side that all the hair have the same length . If you have a little longer hair sections than Eva in front you maybe make this look on the front side :)
Step 2:
After deciding about the front look you want to have and letting free those hair sections ( photo 1 ) take the first one of those you don't want them to be free on both right and left side of your head ( photo 2 ) and make a braid on each hair section of those two ( photo 3 ) . When you are done secure them by using the tiny silicone ribbons - it would be better if they match your hair colour so that they will be invisible . After that you will have two thin braids ( one on each side ) that will be your wreath later ! ( photo 4 )
Step 3:
Seperate the upper hair sections on the top of the back side of your head , lift them up and use the thin comb to give volume to the roots by brushing them on the opposite direction that you normally do.
Then brush back gently your hair so the top won't look messy but keep the volume and use the elastic hair ribbon to make a tight low ponytail :) TIP : let a hair section free out of your ponytail .
Step 4:
Twist the free hair section around the elastic ribbon of your ponytail to cover and 'hide' it and then make it steady by using hair slides ( you'd better have hair slides on the same colour with your hair - in this case , Eva's hair are preety darker than mine so the hair slides i used are visible )
Step 5:
Take the one of the thin braids , twist it around your head and secure it with hair slides . Do the same with the other one and place it behind the first so you will have a braid weath !
Step 6: ( FINAL )
Use the straightening machine ( optional ) to straighten the free sections of your hair and your ponytail as well ! TIP : Use the thin comb while straightening , it will make the result more professional .
And it's over ! As you noticed it's really easy,simple and fast and it's suitable for all the hours of the day :D Special thanx to Eva again for being my model for this hairstyle ! :)
You can contact me on Skype : irina.alexopoulou
or via email : irina.alexopoulou@hotmail.com
irina.rhoads@gmail.com
for any question,suggestion or request!
If you liked my article and blog share it
with your friends and follow me !
Till next time , Take care :*
Irina


No comments:
Post a Comment