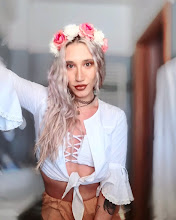
Hallo everyone ! :)

Thanx for visiting my blog! You are always welcome to send me your questions and suggestions even for video tutorials that i will soon upload on Youtube ! ^^

Today's article is about make up and specifically about lips and also some tips to make them look young and juicy ! In the summer it's really important to avoid the winter's no glossy effect so here you can find my personal favourite suggestion for completing any make up look with this easy and sexy way :) NOTE : This trick won't make them look bigger , the point here is to be natural not create something fake . This will just help you highlight your natural lips' view .

So to begin with , before wearing your make up ( be sure the lip part will be the last ) follow your typical skin treatment routine use a nice soap to clean deeply your skin ( I suggest the 'New Ideal Fresh Gel ' from L'OREAL Paris.It is really amazing ! )
TIP ! Use an old tooth brush on your lips and brush them in one direction to smooth them,remove the dead skin and increase the blood's circulation ( this means more red and ''full'' effect lips ) .
After that, apply your make up , give it the style you want ( soft or smokey eyes, cat-eye effect with eyeliner etc ) , put on your rouge or bronzer and once you are done with them you are ready to highlight the most stunning version of your lips :D !
First of all ,let's see what you will need to achieve this look :
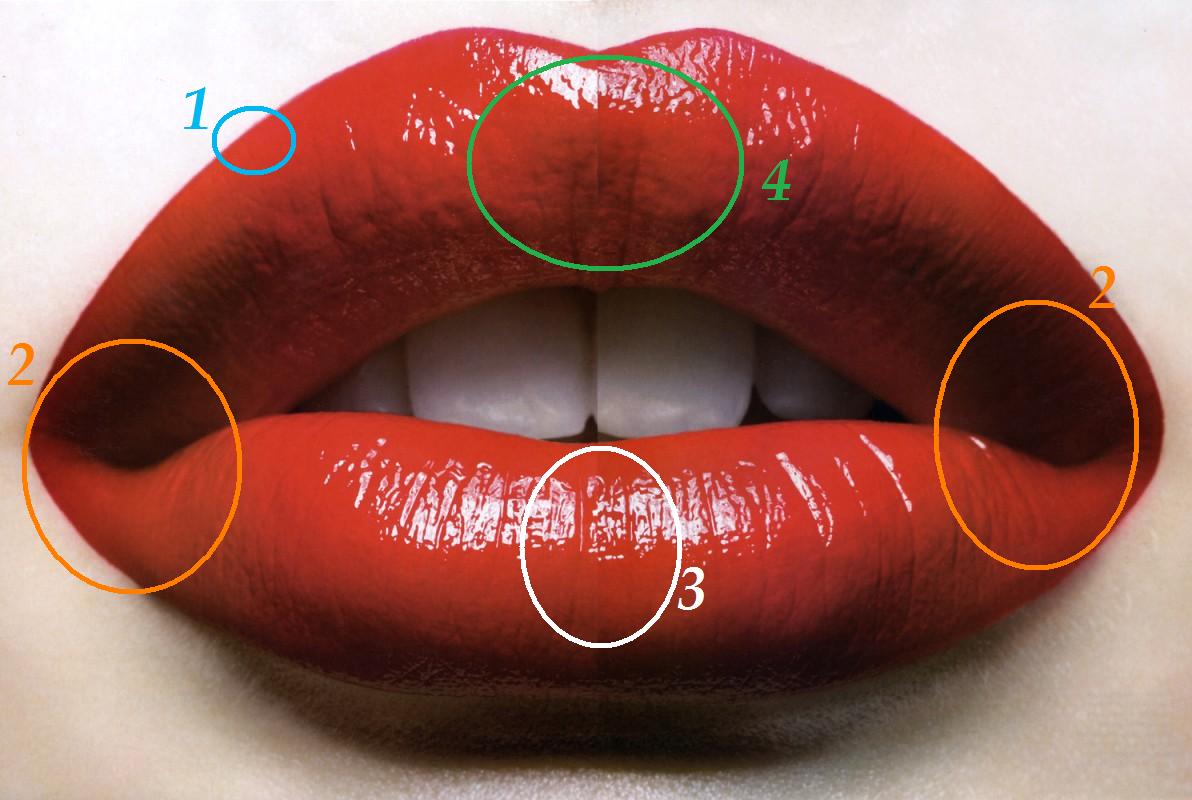
And also , here's a lip 'map' i made to make it easier for you to understand the specific areas i will mention on the following steps :

1. Lips' outline
2. Inner corners the lips
3. Middle of the lower lip
4. Middle of the upper lip
Here are the steps you will follow :) I tried to make it as easier as i could for you !
STEP ONE
 Put on your lip balm and let it be completely absorbed ( it will take some time ) but it's important for your lips' health and also for the final result to make them look soft and to have high levels of moisture .
( As i mentioned earlier i used APIVITA's one - it's a Greek brand- but i really like it as long as it's natural , with organic ingredients and green tea . Other brands that have nice products like this are KORRES and PROPOLINE ( greeks ) I think they are available online ) .
STEP TWO
Use a drop of your liquid make up and dab it gently on your lips so all the products will be applied easier , last longer and the colour will be perfectly combined . Be careful with the quantity of make up you will use . I used CC Cream from Tommy G , tone 2 for oily skin because i like it's format , it's not heavy and it also has SPF Sunscreen filters :D


Right after applying the make up:
Draw carefully your lips' outline (area 1 in the lip map above) with the 'invisible' pensil , the one that matches exactly the natural colour of your lips . This step is really important because this will be the 'base' for the next lip liner that will highlight your lips' shape.
I used SEVENTEEN's Longstay lip shaper, number 21 . But it's important to go and test the colours of the lip shapers before you purchase them ,you have to find the colour that matches exactly your natural lips' one .
STEP THREE
 Draw again the outline using the darker lip pensil ( depends on the lipstick colour too - i chose a dark purple lipstick so the lipliner is a chocolate colour one )
I used MAYBELLINE's New York , COLORsensational lip liner , number 750 'CHOCO POP'
STEP FOUR
Use the lip pensil you used on the previous step and fill the inner corners of your lips ( area 2 on the lip map ) [ left photo ] and then make a virgule line on the middle of your lower lip ( area 3 on the lip map ) [ right photo ]

 STEP FIVE
Now use the 4th and 5th products from the list above , the lipstick and the brush . Put some lipstick on the brush and dap it on your lips so you won't 'erase' the line on the middle of your lower lip , then apply it carefully everywhere ( watch out of the line )
The lipstick is from AVON but i don't remember the number of the tone :/
STEP SIX

Put on your lipgloss and follow this little trick : when you apply it on the upper lip don't simply move it but ''lift'' the lip on applying , this will make the gloss stay more on the right place
I chose a rose tone lip gloss , it is being combined really nice with the dark lipstick and it matches with the most outfits you can possibly choose.
STEP SEVEN
Apply the final product ( 7th on product list ) ONLY on areas 3 and 4 ( look at the lip map in the beginning ) ! And it's over :)

Your final result will be this one :)

 My suggestion for your hair , is to catch up some of them to avoid them stuck on your gloss if it's windy outside , it's preety annoying . So i chose a really fresh hairstyle , without strict ways of catching :) You can also choose a pony tail , your face will be highlighted a lot !
Other nice ideas for colour combination on your juicy lips style :

So that was it for today ! :) Hope this article was easy to understand and useful for you !

Don't forget to contact me on Skype or via email and feel free to ask me any question,to make suggestions for a specific article you want to see or request for tutorials ! Also pictures of this tips on you are always welcome :) If you liked my blog, feel free to share it with your friends :)Come back soon !Hugs , Irina :*
Skype : irina.alexopoulou
emails: irina.rhoads@gmail.com
irina.alexopoulou@hotmail.com

Thanx for visiting my blog! You are always welcome to send me your questions and suggestions even for video tutorials that i will soon upload on Youtube ! ^^

Today's article is about make up and specifically about lips and also some tips to make them look young and juicy ! In the summer it's really important to avoid the winter's no glossy effect so here you can find my personal favourite suggestion for completing any make up look with this easy and sexy way :) NOTE : This trick won't make them look bigger , the point here is to be natural not create something fake . This will just help you highlight your natural lips' view .

So to begin with , before wearing your make up ( be sure the lip part will be the last ) follow your typical skin treatment routine use a nice soap to clean deeply your skin ( I suggest the 'New Ideal Fresh Gel ' from L'OREAL Paris.It is really amazing ! )
TIP ! Use an old tooth brush on your lips and brush them in one direction to smooth them,remove the dead skin and increase the blood's circulation ( this means more red and ''full'' effect lips ) .
After that, apply your make up , give it the style you want ( soft or smokey eyes, cat-eye effect with eyeliner etc ) , put on your rouge or bronzer and once you are done with them you are ready to highlight the most stunning version of your lips :D !
First of all ,let's see what you will need to achieve this look :
 |
Excuse me once again for the bad quality of the photos, my camera is stolen and i haven't bought a new one yet
|
1. Lips' outline
2. Inner corners the lips
3. Middle of the lower lip
4. Middle of the upper lip
Here are the steps you will follow :) I tried to make it as easier as i could for you !
STEP ONE
 Put on your lip balm and let it be completely absorbed ( it will take some time ) but it's important for your lips' health and also for the final result to make them look soft and to have high levels of moisture .
( As i mentioned earlier i used APIVITA's one - it's a Greek brand- but i really like it as long as it's natural , with organic ingredients and green tea . Other brands that have nice products like this are KORRES and PROPOLINE ( greeks ) I think they are available online ) .
STEP TWO
Use a drop of your liquid make up and dab it gently on your lips so all the products will be applied easier , last longer and the colour will be perfectly combined . Be careful with the quantity of make up you will use . I used CC Cream from Tommy G , tone 2 for oily skin because i like it's format , it's not heavy and it also has SPF Sunscreen filters :D


Right after applying the make up:
Draw carefully your lips' outline (area 1 in the lip map above) with the 'invisible' pensil , the one that matches exactly the natural colour of your lips . This step is really important because this will be the 'base' for the next lip liner that will highlight your lips' shape.
I used SEVENTEEN's Longstay lip shaper, number 21 . But it's important to go and test the colours of the lip shapers before you purchase them ,you have to find the colour that matches exactly your natural lips' one .
STEP THREE

I used MAYBELLINE's New York , COLORsensational lip liner , number 750 'CHOCO POP'
STEP FOUR

 STEP FIVE
 Now use the 4th and 5th products from the list above , the lipstick and the brush . Put some lipstick on the brush and dap it on your lips so you won't 'erase' the line on the middle of your lower lip , then apply it carefully everywhere ( watch out of the line )
The lipstick is from AVON but i don't remember the number of the tone :/
STEP SIX

Put on your lipgloss and follow this little trick : when you apply it on the upper lip don't simply move it but ''lift'' the lip on applying , this will make the gloss stay more on the right place
I chose a rose tone lip gloss , it is being combined really nice with the dark lipstick and it matches with the most outfits you can possibly choose.
STEP SEVEN
Apply the final product ( 7th on product list ) ONLY on areas 3 and 4 ( look at the lip map in the beginning ) ! And it's over :)

Your final result will be this one :)


Other nice ideas for colour combination on your juicy lips style :

So that was it for today ! :) Hope this article was easy to understand and useful for you !

Don't forget to contact me on Skype or via email and feel free to ask me any question,to make suggestions for a specific article you want to see or request for tutorials ! Also pictures of this tips on you are always welcome :) If you liked my blog, feel free to share it with your friends :)Come back soon !Hugs , Irina :*

Skype : irina.alexopoulou
emails: irina.rhoads@gmail.com
irina.alexopoulou@hotmail.com